Thursday, December 31, 2009

Revitalizing two dresses

The first dress is one that my youngest sister gave me several years ago. I've been hauling it around since, but have never worn it: mandarin collars just don't look good on me. It's a very nice stretch velvet dress (Bought for my brother's wedding, when my sister was in her early teens. She's since grown at least 6 inches, while I haven't, so I got it.), and I wanted to somehow get some use out of it. So, I turned it into a skirt.
I cut off the bodice, made a casing for the elastic, inserted the elastic, and closed it all up. Quick and easy.
I wanted to add some sort of embellishment- if I could figure out how to do it, I'd use the silver embroidered collar pieces- so I took the 3 buttons from the bodice and sewed them along the edge of the slit in the skirt. A nice little touch of bling! I think I'll be wearing this skirt sometime in the near future.
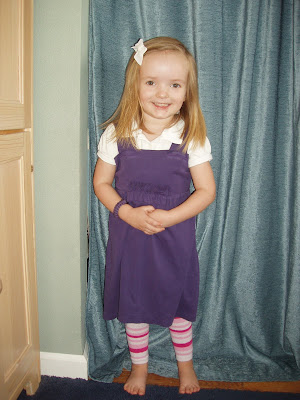
The other dress is one my MIL gave LMS. I think one of her older cousins had worn it when they were younger. Personally, I think it's hideously out-dated. Luckily for me, the bodice was stained, which gave me just the excuse I needed to tweak it a bit.
I did the same thing with this dress that I did with the blue dress, and it turned out just as good. They were both fairly quick and easy to do, and extended the life of the dresses.
However, I'm still debating the lace on the hem. I'm not sure I love it, but I'm afraid the skirt might be too plain if I take the lace off. Any one else have an opinion? I'd love to hear it!
LMS likes it, and apparently it's a princess skirt- hence the fingers holding it up.
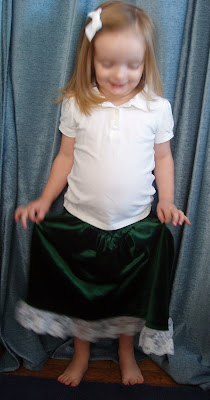
It's also a twirly skirt!

Wednesday, December 30, 2009

Cute skirt for Little Miss Sunshine

Awhile ago, I saw a cute microsuede skirt at Target, but couldn't quite justify buying it, despite it's cuteness.

Since there was quite a bit of fabric leftover from when I made my black embroidered microsuede fabric, I used some of it and some of the lining to make a skirt for LMS.

I used an existing skirt to make a pattern for the microsuede and lining,
then I used some netting to make a ruffle all around so it would be nice and fluffy. The skirt I saw at Target had a netting ruffle that extended past the hem of the skirt, but I kept my ruffle shorter than the hem.
I think it turned out quite well, and LMS likes it :)

Monday, December 28, 2009

Other sewing projects I've been working on

I've sewed several skirts over the last few weeks. I used the moss green corduroy skirt on the right that I bought at Sundance as my pattern.

The tannish one is the skirt I sewed first- too see if my idea of making a skirt using another as a pattern would work. Since it did, I then sewed the embroidered black skirt, followed by the embroidered purple skirt. The skirts are a simple A-line, with elastic in the back waistband. Doing it this way meant I didn't have to put zippers in. I can do it, but it takes time and is fiddly, I'm all about quick and easy. These skirts were fairly quick and easy to make- only taking a couple hours each.

I didn't line the tan cotton skirt, but the purple and black skirts are static-y microsuede, so I had to add a lining to them. That turned out to be a bit of a pain, but worth the effort.

I still need to make a paper pattern, and this spring I'll use it to make some light weight summer skirts.

Thursday, December 24, 2009

Second attempt at repurposing clothing

This time I turned a shirt of mine into a jumper for LMS. I love the color of the shirt, but the cut was awful- it hung like a bag on me.

I intended to make it into a dress, but I wasn't quite thinking far enough ahead when I cut it out, so there ended up not being enough fabric in the right places for a dress. Because of that, I used the sleeves for the front and back bodice sections, the majority of the lower portion of the shirt for the skirt, and pieces of the shirt near the neckline for the straps and the ruffle.

I put a bit of a gather in the skirt, which I pinned to the bodice and then sewed together. I then added the straps (simple tubes sewn, then turned right side out) and the ruffle (sewed a seam down the center of the strip, pulled the threads to gather the fabric in, then sewed it to the waistband). I didn't have to worry about a bottom hem because I used the original hem of the shirt. I also used the hemmed edges of the sleeves for the upper portions of bodice, so again, I didn't have to do any hemming.

T-shirting is a bit of a pain to work with, but overall I'm happy with how the jumper turned out, even if it wasn't how I first envisioned it.

Wednesday, December 23, 2009

Twine letter gone awry

I saw a similar project here, and figured it wouldn't be too difficult to replicate. In theory it wasn't, but in actuality it was. An "S" is a lot harder to wrap than a "T", let me tell you. I eventually figured out a way to do it so it still looked nice.

It wasn't till I was looking at the picture on my computer that I noticed something off. Anyone else see it? I truly didn't realize it till then, either. Not while I was working on it, not while I was taking a picture...
Anyway, the other side looks like this:
not nearly as nice and even, and it looks a lot worse in person.

So I have to decide if I want to rip it all off and do the curves all over, or what. How motivated am I?

Tuesday, December 22, 2009

My first re-purposed clothing attempt


Awhile ago I found several blogs that talked about re-purposing clothing. They turned adult pants into child pants, an adult shirt into a girl's dress, and so on. At the time, I thought 'interesting idea, but I don't see myself doing this since I don't have that many clothes (hence none to spare for other projects), we live too far from thrift stores to make thrifting on a regular basis an economical way of doing things, and LMS doesn't really need more clothes'.

Fast forward a bit, and I was sorting my clothes, making room for winter clothing, and I found a few things I thought might work for re-purposing. The first is a pair of ancient yoga pants that are all stretched out and baggy on me.

I used this tutorial to get started.

I used a pair of pink stretchy pants to make a pattern and cut out pieces for a pair of black pants for LMS. I used the original hem for the hem of the new pants, meaning I only needed to put a waistband in after sewing the legs.

I wasn't too worried about how they turned out: the original pants are well past their expiration date in their current form, so being able to use them for something else is just a bonus. I don't intend for LMS to wear them anywhere, they're for playing outside without ruining her nicer clothes.

Overall, I think they turned out well, and I feel confident in trying more projects as the materials present themselves.

Sunday, December 20, 2009

Hair clippy storage

LMS has tons of clippies- way more than she needs, but I can't bring myself to get rid of any of them, since she does wear them. Just some more often than others. In any case, I was tired of the ribbons hanging on the wall- there just wasn't enough space for all the clippies. So I decided to make a board to clip them to. I'd seen similar things on other blogs and figured it wouldn't be too hard to do.

It was pretty easy- the hardest part was getting the frame to look right. I took a black frame I got at Target and spray painted it an almond color. I decided I didn't like the off white color, so I then spray painted it white. I used some sand paper and a sanding block to sand some of the paint off and give it an 'aged' look. Despite the tons of layers, I think it turned out pretty good: white on top, the off white showing below that, with black below that.
I used spray adhesive to adhere a piece of drop cloth (yep, there's still some left!) to the glass. I wanted to use cardboard, but couldn't find a piece big enough. I hot glued the edges of the fabric to the back, then wrapped the ribbon around it all. Once I got the placement where I wanted it, I hot glued the ribbons to the cloth on the back and the glass. For added security (I'm not sure how long hot glue on glass will hold), I put straight pins through the ends of the ribbons and the cloth.
I put the fabric and ribbon covered glass back in the frame, put the backing in, and put the clippies on the ribbon. Now we have plenty of room for LMS's clippies, and it should match her room when we finally move (it'll be white, purple and green- I've been collecting the bedding for a year or so now, and I think I've got most of the pieces now).