Monday, April 18, 2011

Bicycle shed platform

The one thing our new house doesn't have, that we really wanted, is a garage. Our lot is more than big enough to add one, though, so we're hoping to be able to build a garage next summer. In the meantime, we have to come up with ways to work around its absence.

The woodshop/workspace is in the basement bedroom that will eventually become the guest room/exercise room (complete with a murphy bed to save space!). It's actually quite convenient to the rest of my work space (sewing/crafts/etc), but once I start painting furniture I don't think it will be as nice. Though it's definitely better than being out on the screened in back porch at our last house- I was always sweltering or freezing.

The lawnmower is under the deck. Not optimal since it still gets rained on, but there is no way it's coming in the house. The gasoline fumes would be horrible.

The bikes, bike trailer and jogger are back in the waterproof portable tent shed (we had it on the covered back porch at our last house). I didn't want to put it directly on the ground (especially with how much rain we've been getting), so I built a simple platform to set the tent on.

I bought seven or eight 2"x10"x8' treated boards, four 4"x4"x8' treated posts, some decking screws, and some eye hooks. Total cost: under $100. Much cheaper than buying a whole new shed for $800+.

I laid out the 4 posts

Then laid out the 2x10s on top
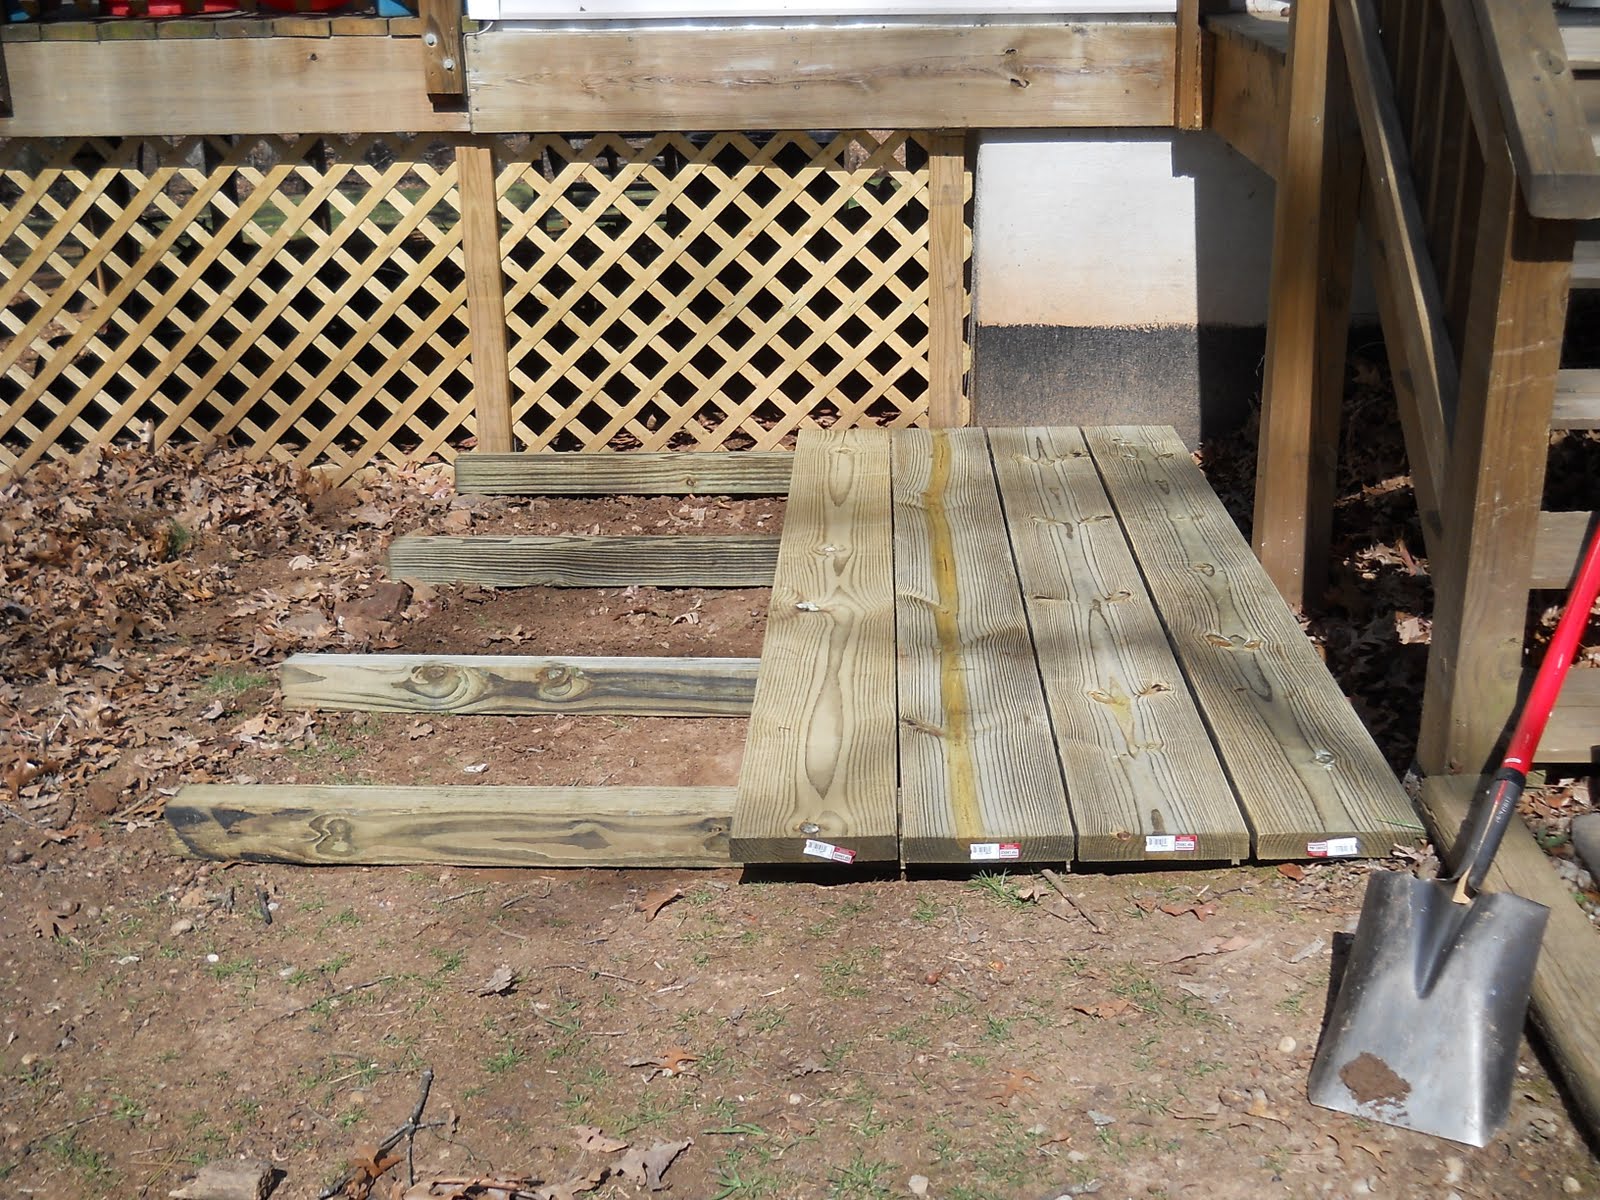

I tried to keep everything as straight and square as possible, but I didn't stress about it too much. I leveled the ground a little, but left a little bit of a backwards slope because I didn't want water pooling on the platform.The deck screws were self drilling, so I didn't even need to pre-drill the holes (yay!). I used a couple deck screws in between each board as super-high-tech spacers. Once all the boards were screwed down, I screwed in the eye hooks and attached the loops on the tent to the hooks to keep it anchored.


(yes, those are parts to LMS' climbing toy and playhouse. we're finally getting the rest of the pieces from my parents' house this summer!)

I could have had this completely done, from picking up the wood, to unloading it, to building the platform, to putting our bikes in the tent in about two hours. The only reason I didn't? The batteries on my drill hadn't been charged in a couple months and I had to wait for them to charge.

Quick, easy, and cheaper than any of the alternatives, yet works well. Can't go wrong there!

Saturday, April 16, 2011

What I've been up to lately

We're all moved into our new house, the rental house is cleaned out, we have our deposit back, and I've pretty much decided where I want to put everything in our new house. Everything is unpacked and put away except for my fabric stash- now that I have space, I need to build a shelf unit to store it all so I can get it out of the bins and see what I actually have.

I've got LMS' room mostly finished. The walls in the house ended up being in worse condition than we thought, so every room will need to be painted sooner rather than later.

 Hideous builder's beige everywhere, nasty pastel fan, massive marks on the walls.

More builder's beige. Nice floors, though.

Close up of the wall- the kid in this room must have jumped on his bed a lot to make marks this dark and deep on the walls.

 First I painted the ceiling and the ceiling fan white. Then I painted the top half of the walls purple.

Then I put beadboard on the lower half of the walls. Then I repainted the top half of the walls lavender because the purple was too overwhelmingly dark and too violet. Then I added trim to the beadboard. Then I added some crown moulding to cover my inept paint job. Then I taped everything off (which I hadn't done before) and painted the crown moulding, beadboard, trim, and closets white.
 I love the lavender walls and the white woodwork! It was extra time and money to repaint, but I am much happier with the results, and it's not going to bug me everytime I go in there.
(because I'm OCD like that)

I still need to paint the bedroom door white- the builder's beige just looks so dirty next to the nice, crisp white of all the other woodwork. And I want to add some cute knobs to the closet doors- green, purple, lavender, something that will give a pop of color to the doors.

 Then I painted the closet green with leftover paint from when the previous owners painted the master bedroom and bath. Solid green in the bathroom, sponged green in the bedroom. Meh. I actually don't mind the green in the bathroom by itself, but it completely clashes with our towels and is a bit too vibrant for a bathroom. Because of the sponge treatment it's not as vibrant in the bedroom, but in LMS's words: "that's not my favorite". However, it's a nice pop of color in the closet and ties in nicely with the green and purple color scheme (same as in her last bedroom).

I still need to finish painting the ceiling fan and put it back together. I also need to find and put on new outlet covers for the outlets- something cuter than the cheap off-white plastic ones that were on them.  And I decided LMS's dresser would work better in our room, so I will build shelves for her clothes in her closet (it's a big closet for one little kid).

We've got most of her furniture moved in now, but I have to get her clothes organized still. Once I get that done, I'll post some more pics.

I love how her room is turning out! Just don't look too closely or you'll see all the mistakes I've made :)

Wednesday, January 12, 2011

Awesome toy storage

...that I built myself.

I love how it turned out.
LMS loves that she can actually find her toys
I love that it didn't cost an arm and a leg, like a storebought version would have
LMS loves that her dress up clothes are easy to find
I love that I was able to customize the design to fit our needs
LMS doesn't mind putting her toys away now that she knows where they all go
I love that it's easy to keep things organized

I found the plans on Ana White's site, the drawers were here and  here and the shelf unit was here.

I love her site! I found it a year ago, and when I did, I had a total epiphany. Instead of wasting money on shoddily built furniture, being unhappy with ugly furniture, or just doing without furniture (which is what we've been doing), I realized I could build it myself. And I could customize the dimensions, colors, and so on, to fit our needs and desires. Ana provides free plans to build furniture, and the directions are clear and easy to follow.

I built the drawers as the plans said, but I adjusted the shelf unit. It wasn't originally supposed to be used for toy storage. I flipped it on its side, shortened the length by two inches so it would be the same length as the drawers, moved one shelf up and eliminated another, added a backing, and and added hooks for dressup clothes. It was all relatively easy to do, though I didn't pay as close attention to some of the instructions as I should have, so the far right column of shelves is a bit narrower than the others. Not really a problem, other than it's too narrow for the metal framed baskets to fit in. For safety, I screwed 1x3's into the back, securing the drawers together and the shelf to the drawers. I definitely don't want the shelves tipping over when (not if) she tries climbing them.

It did take longer to build than I planned, but I really like how they turned out. I can't wait till we move to house with an actual workshop. I think I'll be able to get a lot more done if I'm not sweating like a pig or freezing  to death on the screened in back porch where I've been doing my woodworking.

Tuesday, January 11, 2011

My awesome new desk

...that I built all by myself.

My old workspace (on a different wall before I moved things around):

The rickety desk that we've had since we were newlyweds and that's been through a few too many moves. The oh-so-classy plastic folding table.

No storage, uneven heights, wobbly legs, big gaps on either end. Totally inefficient. (all the stuff under the table had found other homes, but it still didn't work for me)

My new computer station:

Storage and printer in the middle:

My sewing station:

Lots of room to store things when they're not being used.
Lots of room to work.
Nice level workspace.
Love it!

I found the plans on Ana White's site, here, here, and here. The original plans called for two bases, but I knew I wanted a longer desk, so I built 3 instead. I also eliminated the drawers and changed the shelves and dividers to fit my CPU base and my sewing machines. I had to use two desktops (from Lowes), so I altered her desktop plans a little to allow the desktops to be connected underneath, eliminating any movement that might occur. I love her plans- they're easy to follow and easy to build!

I do need to add more paint to the desktop, but it'll have to wait till spring. I only managed one coat before it got too cold and my paint froze. Just one hazard of not having a real workshop.

I know I need a better chair than our extra dining chair, but I need to build a kitchen and a desk for LMS first. Then we'll both get cute chairs and I'll get a rug for the room.

And I need some decorations for the wall, and the list goes on...  :)

Thursday, November 4, 2010

My Goodwill lamp

Awhile ago I found this lamp at Goodwill for $3.95. It was on the ugly side and it was missing its shade, but I liked the shape and thought it had potential. Our front room only has two weird sconces above the fireplace, and they don't provide nearly enough light. I thought this lamp could help solve the problem.

I didn't think there would be much wear and tear on the lamp, so I didn't bother sanding it. Mostly because the thought of sanding metal rubs me very wrong. ick.

I did spray it with primer though, and then sprayed it with Krylon oil-rubbed bronze and some spray poly sealer.

Doesn't it have a nice shape? It's much more evident with the darker paint than it was with the nasty gold finish.

I dressed up a plain lamp shade I found at wally world. I used part of a drop cloth that I already had to cover the shade and make the flowers. I started out with just a few flowers and it looked fine when the light was off, but when the light was on, the seams and such showed, so I added more flowers. I already had the brown ribbon that I used on the upper edge, but I'm not completely sure I like the look now. I think it looked better before. I'll probably end up re-doing it, but I've got lots of other projects to work on, so for now it'll stay as-is.

The wood printers drawer I found at a yard sale will eventually hold Mr S's rank advancements, awards, and service coins, but for now it sits in the corner.
The blue canning jar is one I've had for years, the other blue jar is from IKEA, and I found the glass insulator at a yard sale for a buck.
The square vase and rocks also came from IKEA and the star was from the dollar section at Target.
The home sign was on clearance for a couple bucks at Seagull Book.
Sad to say, but this is one of first real "decorating" attempts. However, I like how it looks, and it'll be easy to change up if I ever get bored with it.

Saturday, October 30, 2010

Our pumpkins this year


I saw polka dot pumpkins a couple years ago, but didn't get a round apple corer till this past year, so this was the first time I got to make them. I like how they turned out, but using pumpkins that are similar in size would definitely work better.

LMS wanted another kitty cat pumpkin, so I cut out more sticky back felt. We had a bigger pumpkin this year, so I had to make the felt pieces a bit bigger.

I love pumpkins in the fall- on the porch and in the kitchen. I've been trying out recipes for gluten free vegan pumpkin muffins and cookies. They've all tasted pretty good, and they smell heavenly! I looove the smell of baking pumpkin goodies (pumpkin with all the spices), so yummy!

Friday, October 29, 2010

Our Halloween Costumes

Little Miss Sunshine wanted to be Cinderella this year, so I decided to sew a dress that could be used for dress-up later, just like I did last year. I started out using the pattern I used last year for her Aurora dress, but the sizing was weird and I didn't like how it looked, so I ended up altering the bodice and side floufs. It was a lot of work, but the results were worth it, in my OCD opinion. I used the tutorials here for the accessories, which was a clever idea that I totally wouldn't have thought of myself. And of course, I changed them up a bit and made them my own. I'm really happy with how her costume turned out, and LMS loves it.

The angle of her head in this pic shows off  her hair nicely. I like this pic, even though the light isn't great.

I wanted to dress up for our ward trunk or treat, but like every year, I couldn't think of anything. As I sewed LMS's Cinderella dress, I realized there was a perfect costume idea in the movie. I sewed up some sheets, and I became Cinderella's Fairy Godmother.

Very blurry pic taken by a neighbor. We were leaving for the ward activity, and it was getting dark, so the lighting wasn't the best and I didn't have the flash on. And LMS wasn't smiling. Oh well.

Better pic, at the ward activity. 


I'll try for some more pictures tomorrow. Since Halloween is on Sunday this year we'll be hitting the mall for some trick or treating tomorrow afternoon. I just have to decide if I want to dress up also. Hmmmm.