Tuesday, April 30, 2013

Guest Room Dresser Re-Do


I first showed this dresser here, and I liked how it turned out. However, once I painted the walls in the guest room I realized the colors just didn't go together that well.
 

crappy night-time picture, but you get the idea

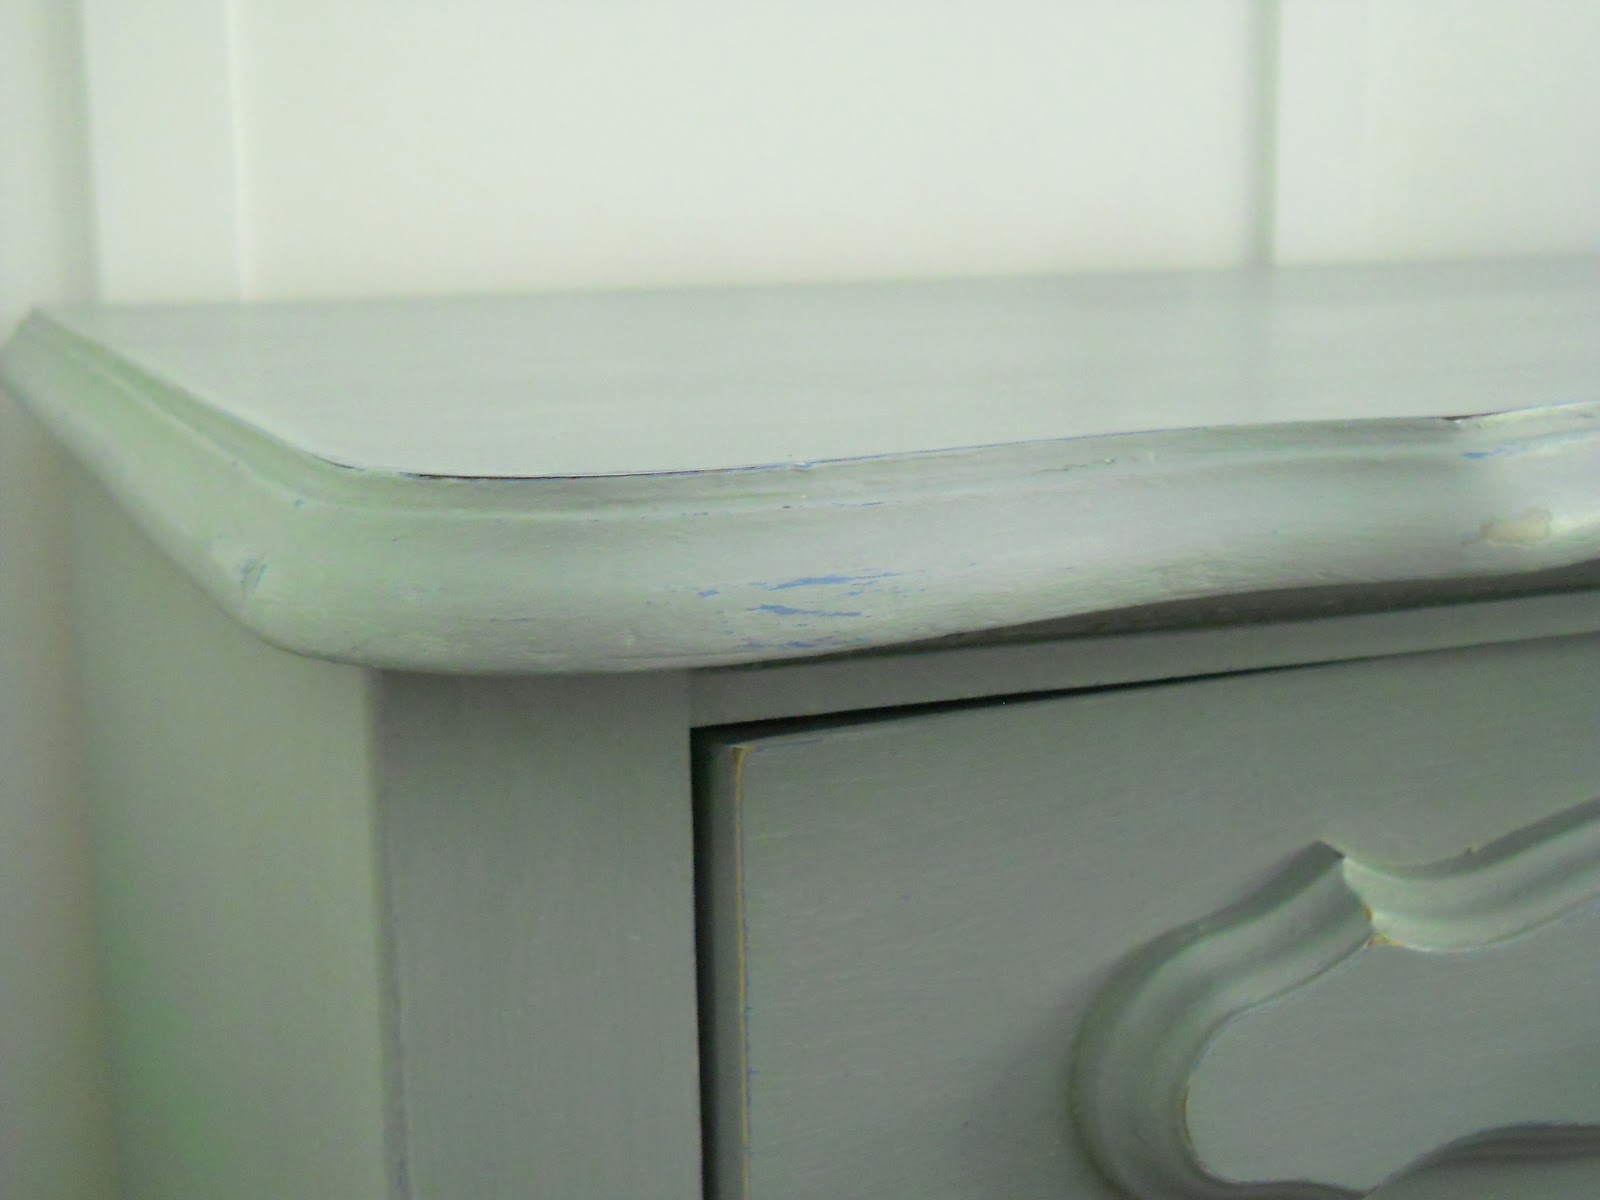
While I was finishing up the closet in the guest room I repainted the dresser. I went with a light gray since I figured it would look good with the aqua on the walls. It's similar to the gray in the closet, but a little darker.


I ended up doing two coats of homemade chalk paint- the first one was too light, so I added more gray to the paint and got a slightly darker color that was more what I had in mind.

Because the edges had gotten a couple nicks in the original {non-distressed} blue paint, I went ahead and distressed the edges a little so future nicks would blend in better. I also put a coat of wax on top of the paint, which really changes changes the final feeling of the finish. It gives it a much smoother, less chalky finish. I never did a coat of wax over the blue paint, and it always had an unpleasant dry, chalky feel to it.


I left the knobs and handles white, but may eventually repaint them a very light gray or a darker gray so there's not such a stark contrast.


So much better! It no longer clashes with the walls and it ties in with the rest of the room (more on the room itself tomorrow).

Monday, April 29, 2013

Guest Room Closet Makeover


I'm going through each of the rooms upstairs, doing the finishing touches so I can finally call them done. I showed LMS' room here, and the next room I worked on was the guest room. Like the other bedrooms, the closet needed to be re-done, so I started with that.

Once again I didn't get a picture of it stacked full of stuff (we've been storing our suitcases and my massage table in there), but here's  a picture of it empty. I really don't understand the point of putting a clothes rod 6 1/2 feet up, in what will most likely be a kid's bedroom. Who thought that would be a good idea?


Like the other closets in this house, it was severely lacking in usefulness and adaptability. I altered this closet similarly to how I did LMS' closet.

I removed the lower shelf and did some spackling and sanding. After painting the inside light gray, I moved that lower shelf up so it was below the upper shelf at a more useful height. Then I added a vertical divider (that I'd already painted) so I could install some shelves. I screwed into the divider from the shelf above it, then added two L braces at the floor to keep the divider in place.


Next I added my favorite shelf strips. Seriously, these things are so useful! I looked through my wood stash and found pieces of shelving leftover from the library bookshelves- too small for the library, but just right for the narrow space in this closet.


Then I screwed the vertical supports into the studs and added the clothes rod supports and clothes rods. I used my Dremel to cut the metal rods to width because they were about an inch or two too long. The plastic end caps keep the metal ends from damaging anyone/thing and keep the rods in place between the wall and the divider.


After the interior was finished, I took the bifold doors off and turned them into regular doors, just like I did with the kitchen closet doors.


This time I remembered to chisel out space for the hinges and it makes a huge difference in how easily the doors close.

We still don't know if we're having a boy or a girl (one more month till the ultrasound!), so this room could stay the guest room or become a little boy's room. Either way, this closet is flexible enough to accommodate either use.

I used the same baskets and bins I used in LMS' closet. This closet is too narrow for two of the clear file boxes to fit on the shelf, so there's a basket and a file box up there.


So much better! I really like the light gray with the aqua on the walls and the space is now so much more efficient.


For now we're storing baby stuff in the baskets and bin. Once we find out if the baby's a boy or a girl we'll move things around a bit. For now it makes it easier to see what we have - I've slowly been buying a few things here and there to supplement the few things remaining from when LMS was a baby. I don't want to make the mistake of buying things we already have :)

Thursday, April 25, 2013

Christmas Dollhouse


Last year I built a play kitchen for LMS for Christmas. This year I built her a dollhouse.


I didn't have time to finish it before Christmas, but I decided that wasn't all bad. LMS could help me decorate the walls of each room if I didn't do it all first.

LMS was very excited and even insisted on playing with it in the car on the way home from my sister's. It ended up next to her in the space between her bench and the front seats, and even though it wasn't really that practical or easy, she managed to play with it and had a great time.

I finally got it caulked and painted a month or so ago, and then we went to Michaels and picked out scrapbook paper to use as wallpaper.

This week I finally glued the paper on the back walls. I had planned on using spray glue and every time I had a little free time to do so, it was raining. I finally had free time that coincided with nice weather and got it done. Unfortunately, the spray glue ended up not working- for some reason the paper wouldn't stick to the painted wood. I tried a glue stick, and that worked pretty well.

We used pieces of patterned and textured paper for "rugs". They can be moved from room to room, depending on where the Little Miss wants them.


Then I let my OCD run wild :) I cut both curved ends off of 4 packages of tongue depressors (about 300 all together) and went to town with the wood glue. I used my Cutco kitchen scissors to trim the edge pieces to fit and used painter's tape to keep everything in place while the glue dried.


 This step was completely unnecessary, but I love how it looks! The whole thing looks just a bit more "finished" than it would with a plain white roof. The Little Miss thinks it looks good too :)


Now she can move in her doll furniture and dolls.

I'm glad it turned out as well as it did, and glad I'm finally finished with it. 
Four months after Christmas :)

Thursday, April 11, 2013

Updated Little Girl's Closet & Room


This project took awhile (I started LMS' room 2 years ago when we first moved in) and went through a couple of incarnations before it finally got to a point where I can call it finished.

The closet is deep on both sides, which caused problems when it came to figuring out the best shelf/closet rod combination.

It started out as this:
not a great before picture, but it's all I've got

Then looked like this:


Then I ripped out the shelves and clothes rods and built some stand alone shelves and it looked like this for the last year and a half or so:


The problem was that the walls aren't perfectly straight, and the shelves ended up not fitting nearly as well as I had thought they would. This was pretty discouraging and I just left the closet like it was for over a year. During that time, I contemplated how to change things so they'd be more efficient and practical.

Last week, during spring break, I finally got to work on the closet.

I sanded the spackle that I had put on the walls after removing the old shelf supports, then put a fresh coat of paint on the walls. I really like this color and think it works great as an accent to all the purple in her room.

I had removed all the trim when I was going to install the stand alone shelves, so after the paint dried I reinstalled the trim and added the supports for the original ridiculously-high shelf and new supports for a lower, more useful shelf. I didn't want to mess with painting an 8' shelf top and bottom, so I took the easy way out and purchased a melamine-covered board from Lowe's for the new lower shelf.

Then I installed my favorite shelf strips on the walls on either side of the closet and searched through my wood stash for shelving. I had prepped some wood for shelving when I first started working on the closet, so I was able to cut down those pieces to the length and width I needed and only needed to paint one new piece of wood for a shelf- bonus for me!


One thing I noticed is that the left side of the closet is about 3" shallower than the right side, so the shelves are not interchangeable from one side to another. No idea why there's such a difference, but that's how it is.

After getting the shelves in, I needed to get the closet rods up. I ended up using pieces from Rubbermaid, which definitely aren't the cheapest, but they do exactly what I want them to do. I installed 3 vertical supports (they're screwed into studs), then 3 sets of rod supports at different heights to accommodate different items of clothing. The rods come in a set of 2 that fit together and are adjustable, but because of their length I ended up using one for the lower rod and the other for the middle rod. They're a bit long, and I haven't yet made up my mind about cutting them down a bit. I used a full two piece set for the top rod.


Once those were up, it was time to organize LMS' clothes. The large metal-framed canvas baskets (found at wally world about a year ago or so ago) were too wide for the space on the left, but I found some woven baskets at Lowe's that fit just right. We hung some clothing up and put the rest in baskets.


I then went all ocd and made tags for each basket, which I've actually wanted to do for a long time, and I feel so much better now that I have, even if it did take awhile to do them all :) I safety pinned the tags to the canvas baskets and threaded ribbons through the holes in the woven basket.


We store off season clothes and clothes that are too big in these file boxes I found at Target. I love them! They have hinged lids and work great for storing things in closets. I use them in our closet for Mr M and my off season clothes as well.


I love how much more functional (there's that word again!) LMS's closet is and the fact that she can actually see and reach all her clothes. I've noticed that she tended to wear whatever was on top of the basket, rather than wearing all of her clothes.

When we organized her clothes, we also switched out her cold weather clothes for spring/summer clothes. Just in time for weather in the high 80's- nothing like instant summer! Now she can see all her cute outfits (several of which I found on clearance at Crazy 8 a couple of months ago and have been saving for warm weather) and actually wear them.

A couple little details I love:

I switched the boring brass knob for a glass knob. It didn't come with the metal flange, which I had to buy separate. It's smaller than the original though, so the screw holes are over the original knob hole. Right now it's held together by the central screw that extends from one knob to another. Still thinking about a fix for this issue.


It's a nonfunctioning knob now- the glass knob didn't accommodate the tongue mechanism, so I just removed it. LMS doesn't like having her door closed and we don't think kiddos need to be hiding behind closed doors, so it's not a problem for us.


I also switched out the boring wood knobs on the closet doors for these cute purple polka dot knobs I found at Hobby Lobby.


And I finally hung pictures and hemmed the curtains:


Now that I finally have LMS's room finished, we're probably having a girl :) But I had that in the back of my mind as I worked, so everything can be rearranged a bit and still work with another little girl in this room. And if we end up having a boy, then LMS has lots of room to herself still.

Wednesday, March 27, 2013

Easy Pantry Organization


keepin' it real- there's a lot of stuff shoved into the pantry

We have a small pantry in our kitchen, and its contents have changed a bit over the last two years. These days, there's not much actual food in it since most of what we eat is fresh or frozen- not many canned or boxed items any more (other than what we've been eating the last month or so since the nausea took over).

I've been sorting and organizing all the closets and cupboards in the house, and once I finished the coat closet, the pantry was up next.

This was actually pretty quick and easy (in the timeline of my projects, anyway).

empty and ready to be taken apart and painted

I emptied all the stuff- some got thrown away, some went to the basement with the other food storage items, and some got set aside to go back in to the pantry. Then I removed the shelves and carefully pulled the 1x2's off the wall that supported the shelves.

I used some spackle to fix the spots where the 1x2's were attached, then sanded the spots when they dried. Next up was a couple coats of white paint to cover the super dingy builders beige on the walls and door and the dingy shelves.

painted and shelves back in

I installed my favorite shelf strips that I've used all over the house so the shelves would be adjustable. One thing I did that I shouldn't have was that I cut the boards down a little before I installed the shelf strips. I ended up over-estimating how much I needed to cut off and now the shelves are a teensy bit narrow- if they're bumped around too much, they'll fall off the supports. Oops. I'm contemplating spacer options to keep the shelves centered on the supports.

adjustable shelves!

Once that was all done, I was ready to get everything moved back in. I started at the floor and moved upward, so the vegetable bin was first. I added some screws to the side to hold the white plastic bin. We ditched paper towels years ago and use wash rags in the kitchen instead. I like them to be able to dry out and not stay damp, and this trash bin from IKEA works great. Under that I put an insulated tote.

Our  crockpots have migrated from cupboard to cupboard as I've tried to find a good spot, so they got the lowest shelf. The bowls were taking up a lot of space in one of the other cupboards and always had things piled on top of them, so they got the next shelf.

The next shelf ended up being full of miscellaneous items: jars for broth and their lids, LMS's piggy bank and penny jars, and some snacks for LMS. The shelf above got the attachments for the KitchenAid mixer, the popsicle molds, and the juicer. They'd all been crammed in other cupboards and weren't very accessible before. The very top shelf (that you can't see) ended up with a few other things like food containers (for foods we can't currently eat) and a cooler for Mr M's lunches.

I replaced the wire basket and hook on the door and I was done!


Sooo much better. And if we need to move things around, it'll be easy to move the shelves to accommodate the items we want to place on them.

Tuesday, March 26, 2013

Wood Vegetable Bin


I've been wanting a bin to store our non-refrigerated veggies (onions, squash, potatoes if we ate them, etc) in for awhile now.

I was stashing some in a basket in the coat closet, some on the counter, some in a basket in the pantry, pretty much wherever there was a little bit of space. This tended to cause problems when I needed something and couldn't remember exactly where I'd stashed it.

Anyway, since I emptied the coat closet and dedicated it strictly to coats, boots, and other things that actually belong in a coat closet, I needed to come up with a better storage option for the veggies.

I knew I wanted something open on the front, with a tilted lip to keep things in. I vaguely remembered seeing something along those lines on AnaWhite.com, and after some searching I found it here.


It wasn't quite what I wanted, since I wanted the bins stacked on top of each other instead of next to each other, but I realized I could easily change it to suit my needs.

I knew it was going to go in the pantry, so I measured the width of the pantry and made the bin half as wide, which would leave space for other things in the pantry. I also measured how deep the pantry is and used that to determine the depth of the bin. I wanted it about 34" tall, so I used that when I drew it all out and figured out the measurements of everything.

I used wood I had on hand: a 1"x12" board (10' long, I think?), several 1"x2"s, and a 1"x3" board.

I wanted good ventilation, so I used the 1x2s for part of the sides and the back, as well as to add "feet" to the bottom. I only had the one 1"x12" and I didn't want to buy any more and I wanted to start using some of the huge stash of random wood pieces sitting in the shed, so the 1x2s worked out great.


I actually cut all the pieces about a week before I ended up putting it together, which did result in a few things that I would have done a little differently if I'd been cutting it and putting it together at the same time. I think it still turned out fine, though- definitely useable as-is.


I used Gorilla wood glue and my handy dandy nail gun to put it all together. I think it took maybe half an hour? Since it's going in the pantry, where it won't be seen, I decided to leave it unpainted. So nice to have a project finished so quickly!


I'm gradually getting the kitchen more organized and more functional, and I love it! I hate having to dig through stacks of stuff to find the item I'm looking for, which is invariably on the bottom/at the back.

I'll show you tomorrow where this bin is now- more things getting organized!